
Email marketing automation is the process of sending the right email to the right person at the right time, automatically, based on specific triggers, behaviors, or schedules.
Instead of manually writing and sending every email, you set up workflows once, and they run on autopilot. When a subscriber takes an action (signs up, clicks a link, makes a purchase, goes inactive), the system responds with a relevant, pre-written email sequence.
Here’s why automation matters:
- Automated emails consistently outperform manual broadcasts on revenue per send
- A majority of email revenue comes from triggered, automated campaigns, not manual blasts
- Businesses using automation report higher sales productivity and lower marketing overhead
- 97% of marketers in 2025 used at least one automated element in their email workflows (Litmus)
If you’re only sending manual broadcast emails, you’re leaving most of your potential revenue on the table.
This guide breaks down the three building blocks of email automation workflows, sequences, triggers, and workflows, in plain language with real examples. By the end, you’ll know exactly how to set up your first automated campaigns and manage them using the Email Marketing Toolkit in Notion. This is email marketing automation for beginners, explained without the jargon.
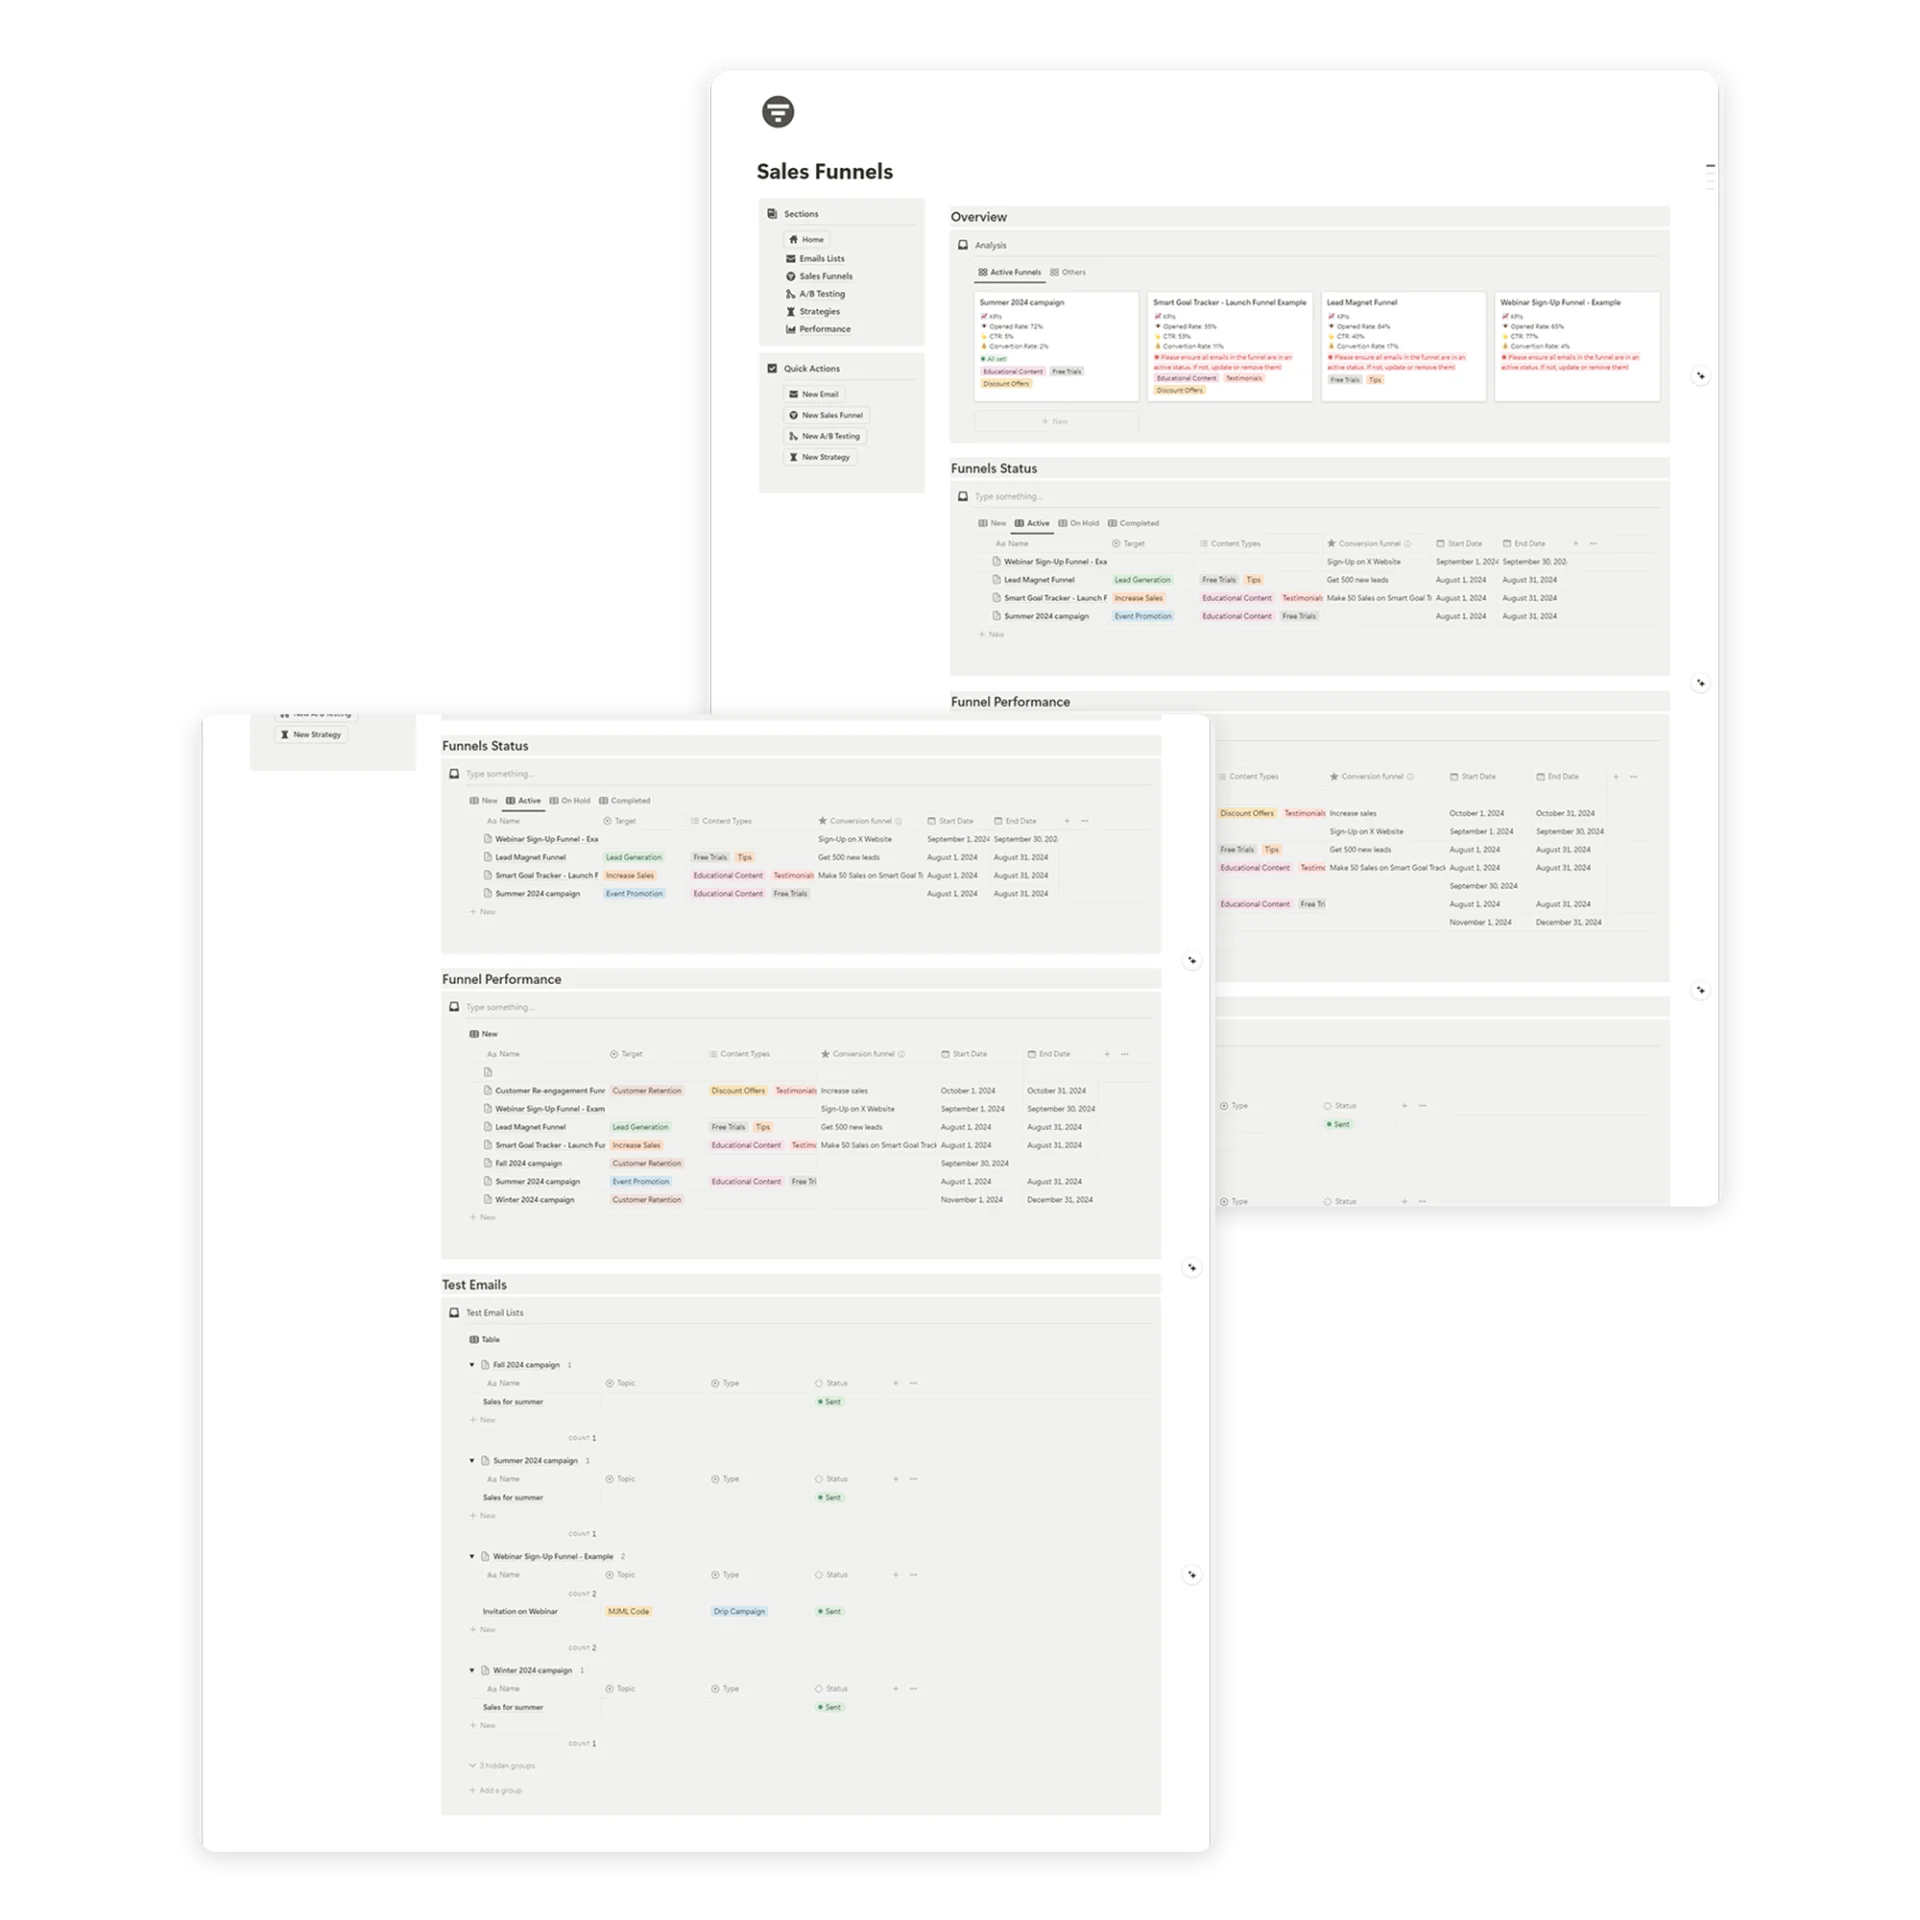
Table of Contents
What You’ll Learn
The 3 Building Blocks of Email Automation
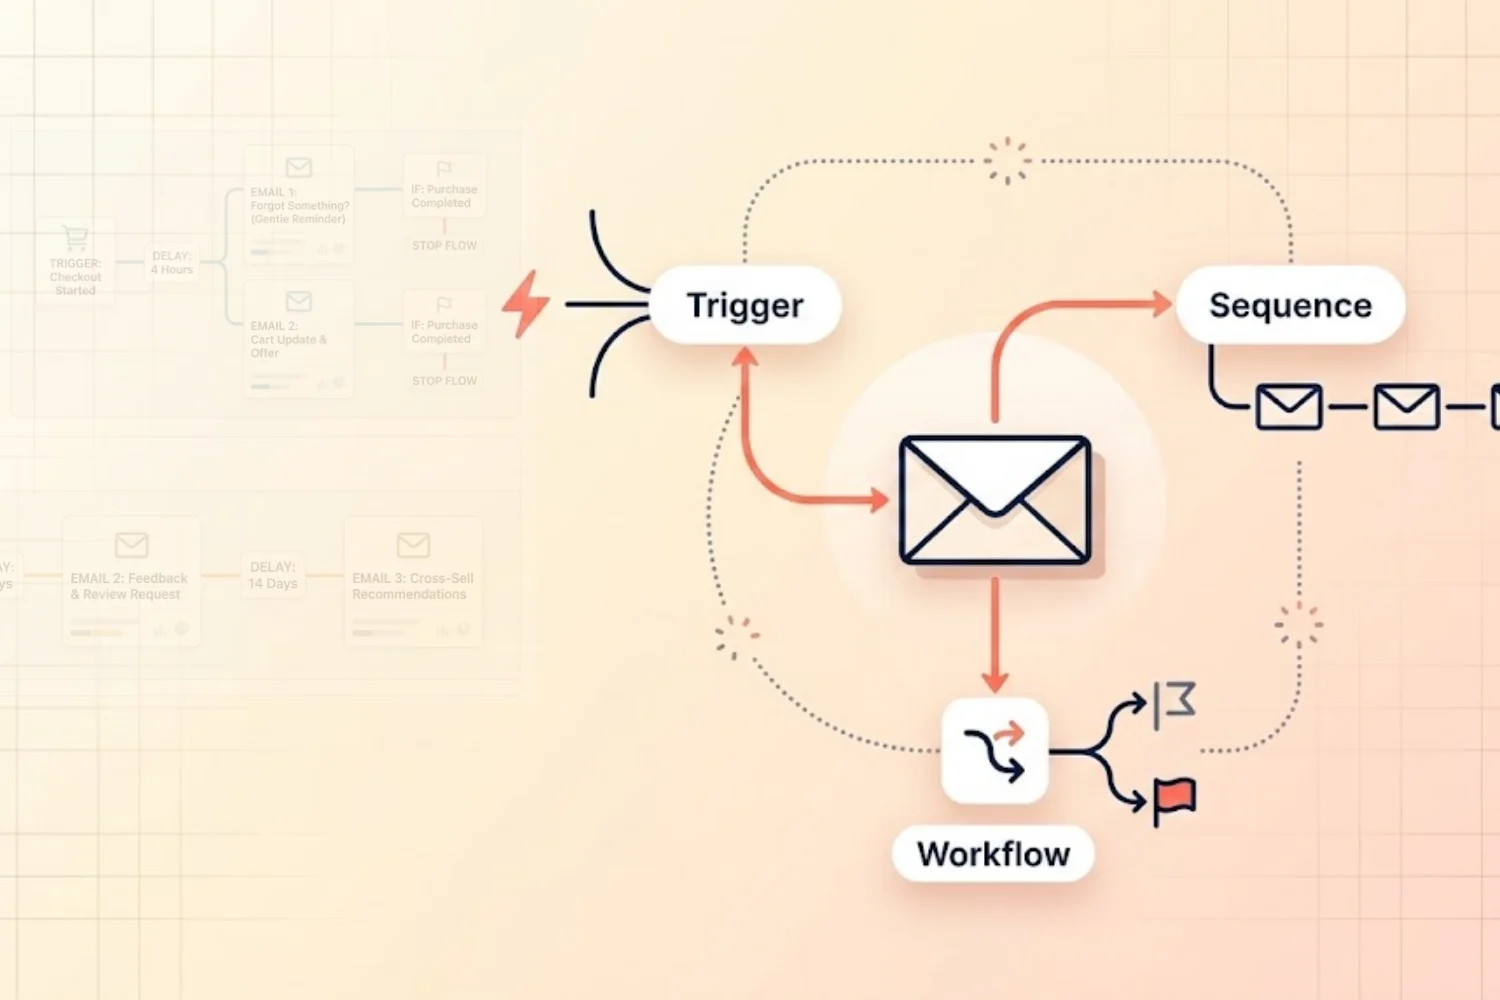
Before we dive into specific workflows, let’s define the three core concepts:
1. Triggers
A trigger is the event that starts an email marketing automation. It’s the “when,” the specific action or condition that tells the system to begin sending emails.
Common triggers include:
- A new subscriber joins your list (form submission)
- Someone makes a purchase
- A subscriber clicks a specific link
- A cart is abandoned
- A subscriber hasn’t opened emails in 60+ days
- A specific date arrives (birthday, anniversary, renewal)
- A subscriber downloads a lead magnet
- A tag or segment is added to a contact
Think of triggers as the starting pistol of a race — without them, nothing begins.
2. Sequences
A sequence is a series of pre-written emails sent in a specific order, usually with time delays between them. It’s the “what,” the actual content your subscriber receives.
Example: A 5-email welcome sequence
- Email 1 (Day 0): Welcome + deliver the lead magnet
- Email 2 (Day 1): Your brand story + what to expect
- Email 3 (Day 3): Top content or best-selling product
- Email 4 (Day 5): Customer success story or testimonial
- Email 5 (Day 7): Special offer or clear call to action
Sequences are linear. One email follows another in a predetermined order.
3. Workflows
A workflow combines triggers, sequences, conditions, and branching logic into a complete automation system. It’s the “how,” the full picture of how emails flow based on subscriber behavior.
A workflow might look like this:
- Trigger: New subscriber signs up
- Action: Send welcome email
- Wait: 1 day
- Condition: Did they open the welcome email?
- Yes: Send “Top Resources” email
- No: Resend welcome with a different subject line
- Wait: 3 days
- Action: Send promotional offer
Workflows add intelligence to your sequences by adapting to what each subscriber actually does.
The 7 Essential Email Automations Every Business Needs
Here are the seven automations that form the backbone of any successful email marketing system, ordered by priority.
1. Welcome Email Sequence
Trigger: New subscriber signs up
Why it matters: Subscribers are most engaged in the first 48 hours. Welcome emails have an average open rate of 50–60%, far higher than regular campaigns.
The Perfect Welcome Sequence (5 Emails):
Email 1: The Instant Welcome (Day 0)
- Deliver promised lead magnet or resource
- Thank them for subscribing
- Set expectations for what’s coming
- Subject line example: “Welcome! Here’s your [resource name]”
Email 2: The Story (Day 1)
- Share your brand story or mission
- Explain why you do what you do
- Build emotional connection
- Subject line example: “The story behind [your brand]”
Email 3: The Value Bomb (Day 3)
- Share your best content, top resources, or most popular product
- Demonstrate your expertise
- Subject line example: “Our most popular [resource/product] — and why people love it”
Email 4: Social Proof (Day 5)
- Share testimonials, case studies, or user stories
- Let others sell for you
- Subject line example: “How [customer] achieved [result] with [your product]”
Email 5: The Soft Offer (Day 7)
- Present your product/service with a clear CTA
- Include a special welcome offer if possible
- Subject line example: “A special thank-you offer for new subscribers”
2. Abandoned Cart Email Sequence (E-commerce)
Trigger: Item added to cart but checkout not completed
Why it matters: A large share of online carts are abandoned, and recovery emails can recapture a meaningful portion of those lost sales.
3-Email Recovery Sequence:
Email 1: The Gentle Reminder (1 hour after abandonment)
- “You left something behind”
- Show cart contents with images
- Link directly back to checkout
Email 2: The Objection Handler (24 hours)
- Address common reasons for abandonment
- Include customer reviews or testimonials
- Offer free shipping or a small incentive
Email 3: The Urgency Push (48–72 hours)
- “Your cart is about to expire”
- Final incentive (discount code)
- Clear deadline to create urgency
3. Post-Purchase Sequence
Trigger: Customer completes a purchase
Why it matters: The post-purchase window is when customers pay the most attention to your brand. Use it to build loyalty and encourage repeat purchases.
4-Email Post-Purchase Sequence:
Email 1: Order Confirmation + What to Expect (Immediately)
- Confirm the purchase with details
- Set expectations for delivery/access
- Include a “What to do first” guide
Email 2: Check-In (3–5 days)
- Ask if they received their order / accessed the product
- Offer help or support resources
- Link to FAQ or getting-started guide
Email 3: Request a Review (7–14 days)
- Ask for honest feedback
- Make it easy with a one-click rating
- Offer a small incentive for leaving a review
Email 4: Cross-Sell or Upsell (14–21 days)
- Recommend complementary products
- “Customers who bought [X] also love [Y]”
- Special returning customer offer
4. Lead Nurture Sequence
Trigger: Subscriber downloads a lead magnet or signs up for a webinar
Why it matters: Most leads aren’t ready to buy immediately. Nurture sequences educate and build trust until they are.
5-Email Nurture Sequence:
- Email 1: Deliver the resource + introduce the topic
- Email 2: Deep-dive educational content related to the lead magnet
- Email 3: Case study showing results
- Email 4: Common questions and objections answered
- Email 5: Soft pitch with a clear offer
Space emails 2–3 days apart. Each email should stand on its own while building on the previous one.
5. Re-engagement Sequence
Trigger: Subscriber hasn’t opened or clicked in 60–90 days
Why it matters: Inactive subscribers hurt your deliverability. Re-engagement campaigns either win them back or clean your list.
3-Email Re-engagement Sequence:
Email 1: The Check-In
- “We noticed you’ve been quiet”
- Ask if they still want to hear from you
- Offer a preference update option
Email 2: The Value Refresh (3 days later)
- Share your best recent content or offer
- Remind them why they subscribed
- “Here’s what you’ve been missing”
Email 3: The Breakup Email (7 days later)
- “Last chance to stay on our list”
- Clear unsubscribe option
- If no engagement, remove from active list
The breakup email consistently performs well because people respond to the fear of losing access.
6. Birthday/Anniversary Automation
Trigger: Subscriber’s birthday or signup anniversary date
Why it matters: Personalized milestone emails feel thoughtful and drive high engagement. Birthday emails consistently outperform standard promotions on revenue per email.
Simple Birthday Email:
- Send 1–2 days before the actual date
- Include a genuine, warm message
- Offer a special birthday discount or gift
- Keep it simple — one clear CTA
7. Product Launch / Event Sequence
Trigger: Manual start date (scheduled) or tag-based
Why it matters: A structured launch sequence builds anticipation and maximizes conversions.
4-Email Launch Sequence:
- Email 1 (7 days before): Teaser — “Something big is coming”
- Email 2 (3 days before): Details + sneak peek
- Email 3 (Launch day): “It’s live!” — full details + CTA
- Email 4 (2 days after): Social proof + last-chance urgency
How to Set Up Your First Automation: Step-by-Step
Ready to build your first automated workflow? Here’s how to do it:
Step 1: Choose Your First Automation
Start with the Welcome Sequence — it’s the highest-impact, easiest-to-implement automation. Every business needs one, and it works for every industry.
Step 2: Write Your Emails
Use the welcome sequence template above as your framework:
- Write all 5 emails before setting anything up
- Keep each email focused on one goal
- Write subject lines for each email (and A/B test variants)
- Include clear CTAs that match each email’s purpose
Step 3: Set Your Trigger
In your email service provider (ESP), create a new automation:
- Trigger: “New subscriber added to list” or “Form submitted”
- This ensures every new subscriber enters the sequence automatically
Step 4: Build the Sequence
- Add your emails in order with time delays between them
- Typical delays: Day 0, Day 1, Day 3, Day 5, Day 7
- Set the send time (e.g., 10am in the subscriber’s timezone)
Step 5: Add Conditions (Optional)
For a basic welcome sequence, conditions aren’t required. But if you want to add intelligence:
- If subscriber clicks a product link → Tag as “interested in [product]”
- If subscriber doesn’t open Email 1 → Resend with a different subject line
Step 6: Test Before Going Live
- Send yourself test emails for each step
- Check links, images, and formatting on mobile
- Verify the trigger fires correctly
- Confirm time delays work as expected
Step 7: Launch and Monitor
- Activate the automation
- Monitor for the first week: check open rates, click rates, and unsubscribes
- Make adjustments based on early performance data
Planning Your Automations With the Email Marketing Toolkit
Managing multiple automations can get complex quickly. The Email Marketing Toolkit for Notion helps you plan, document, and track all your automations in one place.
What You Can Plan in the Toolkit
- Automation overview — List all your active and planned workflows
- Sequence mapping — Document each email in every sequence (trigger, subject line, send time, goal)
- Email drafts — Write and store all your automation emails
- Performance tracking — Log open rates, click rates, and conversion rates per automation
- Testing notes — Document A/B tests and results
How to Use the Toolkit for Automation Planning
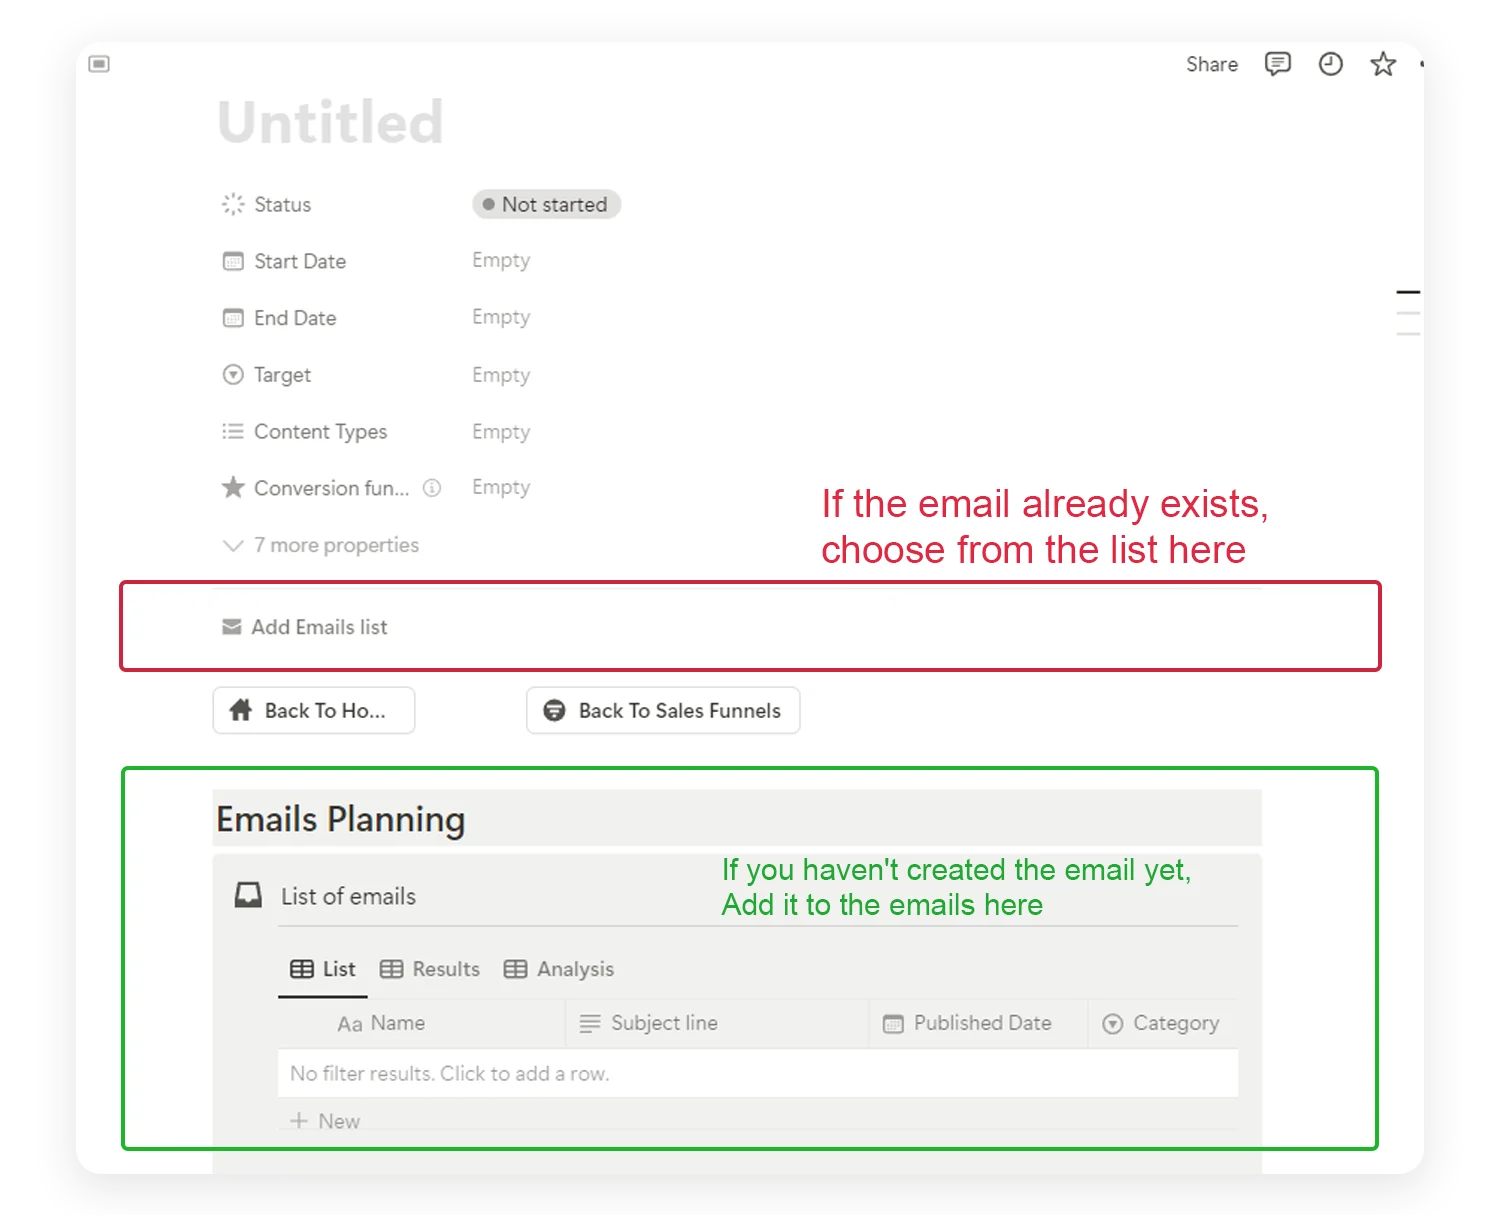
- Create an automation entry for each workflow (Welcome, Abandoned Cart, etc.)
- Map out the sequence — List every email with: subject line, trigger, delay, and goal
- Write your emails in the draft section
- Track status — Draft → Written → Tested → Live
- Log performance after launch — review and optimize monthly
Automation Mistakes Beginners Make (And How to Avoid Them)
1. Building Too Many Automations at Once
Start with one automation (welcome sequence), get it working well, then add the next. Trying to build 5 workflows simultaneously leads to half-finished, untested automations.
2. Setting Delays That Are Too Short
Bombarding subscribers with daily emails feels aggressive. Give people breathing room. 2–3 days between emails is a good starting point for most sequences.
3. Never Updating Your Automations
Automations shouldn’t be “set and forget forever.” Review every automation quarterly. Update outdated content, refresh offers, and optimize based on performance data.
4. Ignoring the Exit Conditions
What happens when someone in your welcome sequence makes a purchase? They should exit the nurture flow and enter the post-purchase sequence. Without exit conditions, subscribers receive irrelevant emails.
5. Not Personalizing Beyond the First Name
True personalization means segmenting by behavior, not only inserting [First Name]. Send different content to people who clicked vs. people who didn’t. Use tags and conditions to adapt your sequences.
6. Forgetting Mobile Optimization
Most emails are opened on mobile. Every automated email should look great on a phone, with short paragraphs, large buttons, and a single-column layout.
Your Email Automation Roadmap: First 90 Days
Here’s a realistic timeline for building your automation system from scratch:
Month 1: Welcome Sequence
- Write and launch your 5-email welcome sequence
- Set up tracking for open rates and click rates
- Monitor and optimize subject lines
Month 2: Revenue Automations
- Build your abandoned cart sequence (if e-commerce) OR lead nurture sequence (if service/B2B)
- Set up post-purchase or post-signup follow-up emails
- Begin tracking revenue per automation
Month 3: Optimization and Expansion
- Launch your re-engagement sequence for inactive subscribers
- Add birthday/anniversary automation
- Review all automation performance and optimize
- Plan your next round of automations (product launch, seasonal campaigns)
By the end of 90 days, you’ll have 3–4 active automations generating revenue and engagement 24/7.
Frequently Asked Questions
Which automation should I build first?
The welcome sequence. Every business needs one, it has the highest open rates of any automation (often 50% or more), and it sets the tone for every future email a subscriber receives.
What is the difference between a sequence and a workflow?
A sequence is a linear series of pre-written emails sent in order with time delays. A workflow combines sequences with triggers, conditions, and branching logic, so subscribers receive different emails based on what they actually do.
How long should the delays between emails be?
2 to 3 days is a safe starting point for most sequences. Welcome flows can run tighter (Day 0, 1, 3, 5, 7). Re-engagement and nurture flows usually do better with 3 to 5 day gaps. Test and adjust based on open and click rates.
Do I need a paid email service provider to run automations?
Most automations require an email service provider with workflow features. Free plans on tools like Mailchimp, MailerLite, Brevo, or Beehiiv cover basic welcome and tag-based flows. More advanced conditions and branching usually need a paid plan.
How often should I review my automations?
Every 90 days at minimum. Check open rates, click rates, unsubscribes, and revenue per automation. Update outdated content, refresh offers, and retire any sequence that no longer matches your current product or audience.
Start Automating Your Email Marketing Today
Email marketing automation isn’t reserved for big companies with big budgets. The tools are accessible, the strategies are proven, and the ROI is significant. Industry studies consistently show a strong return for every dollar spent on email.
The key is to start simple and build systematically:
- Understand the building blocks. Triggers, sequences, and workflows.
- Start with one automation. The welcome sequence.
- Write before you build. Plan your emails first, then set up the tech.
- Test everything. Before going live and after launch.
- Track and optimize. Monthly reviews drive continuous improvement.
- Expand gradually. Add one new automation per month.
Need a centralized workspace to plan, write, and manage all your email automations? The Email Marketing Toolkit for Notion gives you everything in one place.
👉 Get the Email Marketing Toolkit
Want to start with a simple calendar for scheduling your automated campaigns? Try the Email Marketing Mini Planner. It’s free.
If you want the full system today, start with Business Pack Pro. If you want to test the approach first, duplicate the Free Business Pack and run your next two weeks from it. If your single biggest pain is sales follow-up, start with the CRM System.